Clean a Stinky Garbage Disposal

If your kitchen is developing an odor and you’ve taken out the trash, it could be your garbage disposal.  Even if you run your garbage disposal until the last shred of food is gone, and you let the water run the recommended time, you can still wind up with an out-of control science experiment that stinks up your kitchen.

The reason is – some food is going to stick to the inside of the grinding chamber, and it’s going to decay.  You can clean the chamber by grinding ice and lemon rinds, adding baking soda or rinsing with vinegar and water.  Or, you can add commercial cleaners like Disposer Care, which is available at discount stores and most home centers.

garbage disposalIf there is still an odor after cleaning the grinding chamber, you’ll need to attack the underside of the splash guard.  Cleaning the splash guard is easier than you think.  you don’t even have to remove it.  Just clean it with a toothbrush and cleaner as shown.

Dip an old toothbrush in antibacterial grease-cutting kitchen cleaner and lift up one corner of the splash guard.  Scrub off the crud and rinse with cold water.  Repeat with each flap until it’s totally clean and rinsed.

Simple as that!

To prevent future odors and to ensure all the food particles are cleared away, don’t turn off the garbage disposal as soon as the grinding noises stop.  It is better to leave the garbage disposal on (with the water running) for several seconds after the grinding noises subside, as there may still be small particles in the disposal unit which have not yet been cleared away.

– S.O.
The Patrick O’Brien Agency – Fishers, IN

6 Amazing Household Things You Can Do With Salt

morton salt

Salt isn’t just for flavoring your food. Thanks to HGTV magazine, I just learned of 6 amazing ways to use salt around the house to fix some oops and clean a variety of items from tools to body parts.

1.   Remove the stains from a coffee mug

Pour half a teaspoon of salt into a stained coffee cup or teacup, scrub with a dry paper towel, then rinse.  The alkaline in the salt gets rid of discoloration from coffee or tea like magic.

2.   Neutralize a stinky sink

After cooking smelly things like onions and garlic, add a heaping tablespoon of salt to a quart of boiling water, then pour it down the drain to clear away odor-causing grease and bits of food

3.   Lift wine stains

Instead of cleaning a stain with a wet cloth, which can make it spread, blot the area with a dry cloth.  Then pour on a heaping mound of salt to help lift the stain off the fabric.  Let it sit for 30 minutes, then blot clean with cold water and wash.

4.   Eliminate rust

Use a paste of six tablespoons of salt and two tablespoons of lemon or lime juice on a dry cloth to wipe away rust from almost anything metal.  Use on bicycles, outdoor furniture, and tools.  Rinse thoroughly.

5.   Clean a cast iron skillet

Ad a splash of water and a teaspoon of Kosher salt to a cast-iron skillet.  Use a paper towel to wipe off food without causing the pan to lose its seasoning.

6.   Use as a body scrub

There are many exfoliating products for the body on the market but you can make a scrub at home with just a bit of sea salt.  Just mix two parts sea salt and one part grape seed oil and you’ve got a great exfoliating body scrub.

I learned quite a bit from this article in the HGTV April issue.  I think the wine tip and the stinky sink fix will come in especially handy at our house.  Did you learn anything new?  What will you try first?

– S.O.
POB Agency

10 Ways We Reduce Dust (and Allergies) in our Home

Today is the first day of spring and we are looking forward to cleaning up the garage, the yard, and “spring cleaning” inside the home.  With two small children, it’s hard to have a perfectly clean home every day but the one thing that will stop me dead in my tracks year round (no matter what I’m doing) is dust.  Why does dust bother me so much?  Because dust mites live in dust.  YUCK!  And, Pat and Jack have allergies that can go berzerk.

I know dust mites exist and I try hard not to think about them living in our pillows, bed covers, mattresses, furniture, carpeting, and clothing.  (Another YUCK!)  But, I feel better knowing I can reduce the amount of mites in our home by staying on top of the dust with some easy steps.

Here’s our top 10.

  1. Vacuum floors and upholstered furniture once a week
  2. Keep your closet clean and the floors clear so you can vacuum easily & regularly.
  3. Keep furnace filters clean.
  4. Limit knickknack decor.
  5. Instead of heavy drapery, hang lightweight curtains & shades.
  6. Avoid stacking piles of mail, newspaper, and magazines on tables and shelves.
  7. Keep clothes you wear regularly in your bedroom or closet and store the rest.  Use garment boxes and clear plastic containers to store items on shelves so they don’t collect dust.
  8. Store stuffed animals in a closed toy box or closet & regularly wash stuffed toys in hot water.  I’ve heard you can put a stuffed animal in a plastic bag and in the freezer overnight every few weeks to help kill dust mites – but I haven’t tried that yet.
  9. Wash your sheets (and the blankets you wrap up in when you snuggle on the couch) weekly
  10. Have your area rugs cleaned once or twice a year

Can you think of any other ways to reduce dust in the home?  Who’s ready to get started “spring cleaning”?!

– S.O.
POB Agency

Visit Patrick’s profile on Pinterest.

8 Tips For Throwing A Successful Holiday Party

Tis the season for Holiday Parties!  When you attend one, you may not give much thought as to how much pre-planning a host may do prior to the event.  But if you’ve ever been the host – Oh my!  It can get pretty stressful.

We recently had a party for 12 and in between work, kids, volunteer work, and day-to-day household chores, thank goodness we gave ourselves two weeks to prepare!  But, it all came together nicely and I’ll share some tips I think will ensure your party is a success without the stress:

1. A store-bought veggie tray is OKAY. Yes, our guests liked the hearty finger food but at the end of the night, that veggie tray was empty.  Guests like to nibble and snack as they drink their cocktail and they don’t want to leave feeling stuffed.

2. If you’re serving dinner, choose something that you can make ahead of time.  Have a casserole or lasagna pre-prepared so you can greet your guests as they arrive.  You’ll be free to mingle with everyone instead of stuck cooking in the kitchen while your guests hover over you feeling as if they should be doing something to help.

3. Decorate with inexpensive festive décor & play music. Simple wreaths and a few candles are an inexpensive way to create a warm and cozy atmosphere.  Our decor was minimal this year (to save time):  a tree and a simply decorated mantle.  We put on holiday music from one of our TV channels (who has time to create a playlist?!??!), lit candles and dimmed our lamps.  It was just enough.  We received many compliments on how cozy the house felt.

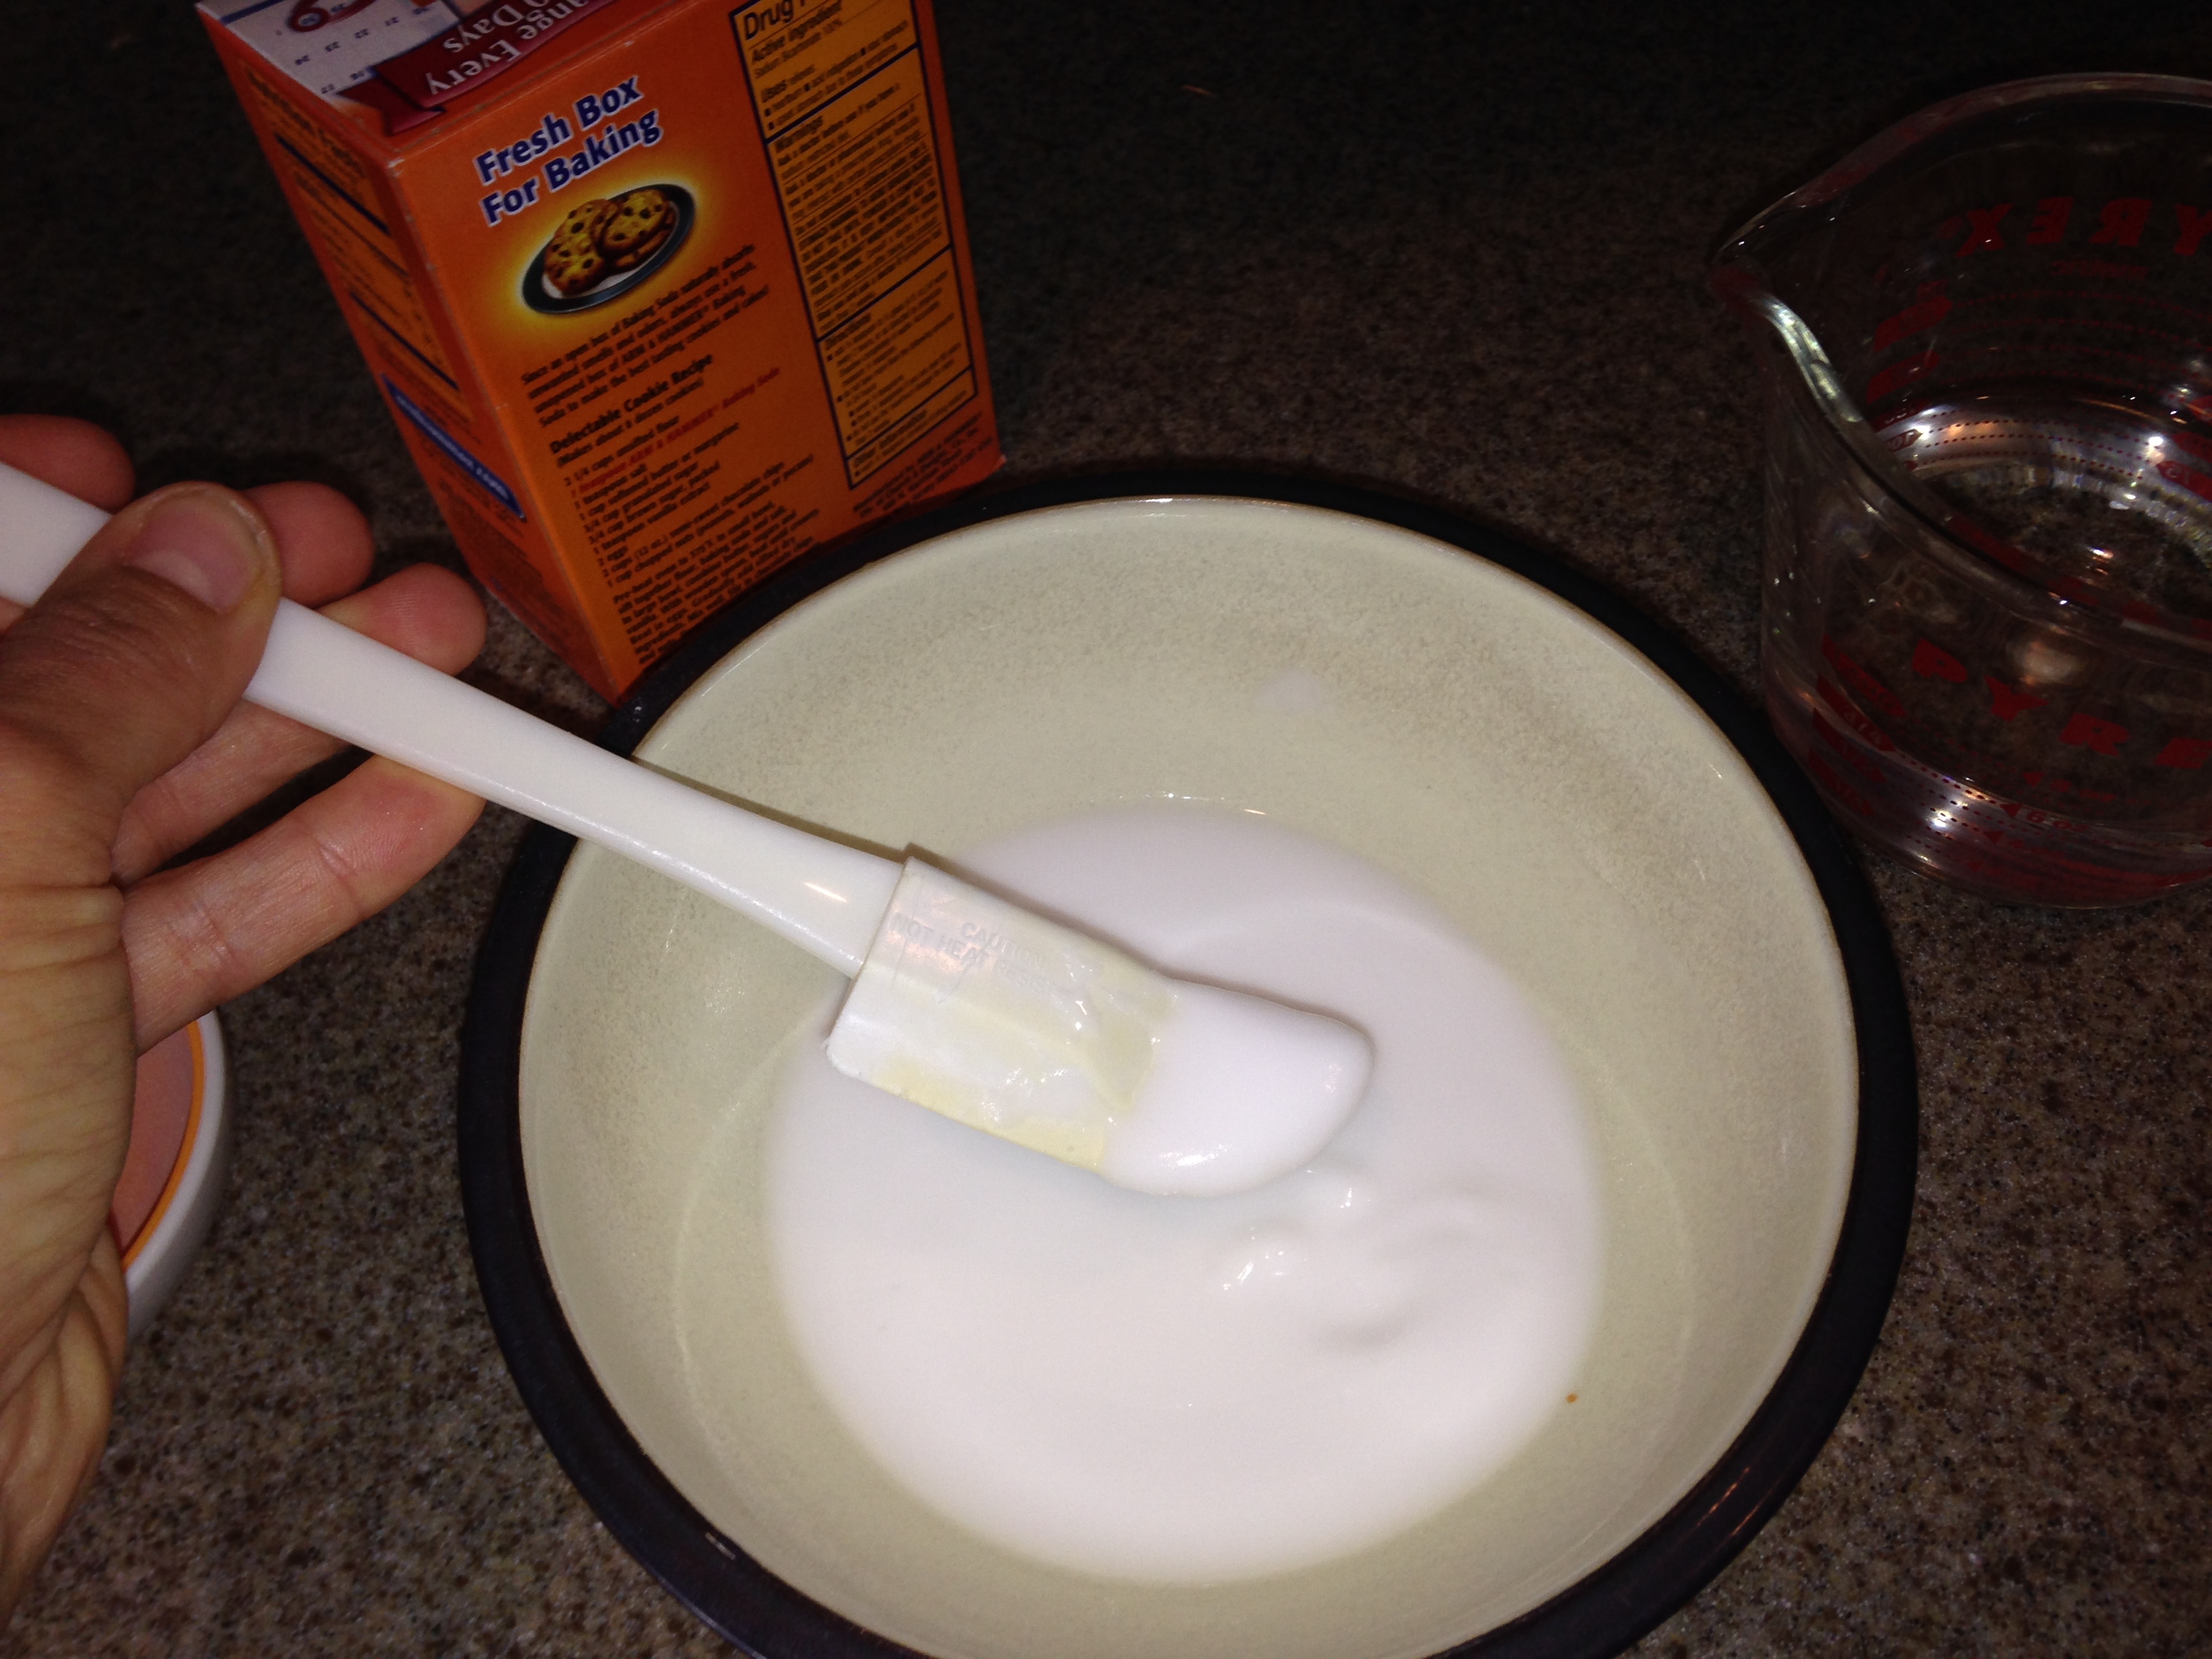
Click for EASY recipe!

4. Serve ONE holiday drink for all.  Check out Pinterest for a TON of ideas.  Try a Candy Cane or “The Grinch” Martini; A Hot Apple Rum Punch; or the one I served:  Pomagranate-Cranberry Sparklers.  Even the guys drank it and LOVED it.  If you’re worried about drinking and driving, have a list of driving services and/or taxi numbers on hand OR offer them a guest room.

5. On that note, don’t stress your guest room accommodations.  We have 1 guest room but 2 couples stayed over.  I knew this could be a possibility after serving cocktails so I made sure all the beds had neat and clean bedding – even if one couple had to sleep on (clean) Avengers sheets.  But, it’s okay!  These are our friends and no need to stress the accommodations.  They were safe and slept great!

6. If it’s a relatively small party, enjoy a white elephant gift exchange. This party we hosted is an annual party and we always do a white elephant gift exchange.  It’s a blast!  It can be something from your home that you are no longer using; something funny; or something purchased.  It’s always fun watching people switch and swap as each gift is chosen. We’ve lucked out some years with a great gift and other years we’ve gone home with a gag gift – like a singing turkey.  If that’s too risky due to a more conservative group, consider something even simpler than that, like an ornament exchange.

7 If you’ve got the funds, consider hiring help. A catering service will allow you to fully enjoy the party. A bartender is also a nice addition, especially if you’re going for more complicated & diverse cocktails to serve. You might feel like you’re taking the easy way out, but in the end, you’ll be glad you got to engage in the holiday merriment along with your guests.

Have you hosted a Holiday Party (or any party) recently?  What did you do to cut back on time and stress?  Share your tips and success stories with us!

S.O.
POB Agency

Christmas Tree Fires are More Deadly than Typical Fires – Follow our Tips

The Christmas season has begun and it’s one of our favorite times of year.  Our Facebook news feed contains many posts of our friends’ beautifully decorated Christmas trees as well as pictures of them cutting their live tree at the Christmas tree farm.  We thought this would be an excellent opportunity to remind you of how to care for your live tree so it does not catch on fire.

christmasTrees are not a fire hazard if you take care of them, keep them watered, and decorate them carefully.  However, should the tree catch on fire, it is one of the most deadly fires.  In fact, one of every 66 reported fires that began with a Christmas tree resulted in death according to The National Fire Protection Association (NFPA).  The tree provides an unusually large amount of fuel leaving little time to get out of the house.  They are especially deadly if they occur at night when people are sleeping.

  • Keep the tree well-watered.  Check the water supply at least once a day.  Trees can drink a lot of water.
  • Use new or high-quality lighting.  Never use lights with frayed cords or worn connections.  Consider switching to LED (light-emitting diode) holiday lights. In addition to the energy and cost savings, LED lights are much cooler than incandescent bulbs, reducing the risk of fires.
  • Keep the tree away from candles and other heat sources such as a fire place.  (A heat source too close to the Christmas tree started one of every five (18%) of Christmas tree fires from 2006-2010 according to the NFPA).
  • Turn off the lights before leaving home and before going to bed.
  • Dispose of the tree as soon as it feels dry.  Many cities, including Indianapolis and Fishers, will provide safe disposable sites for your tree beginning December 26th.  Big box stores such as Home Depot will also provide drop off sites.  (Do not burn the tree outside your home)!

In addition to our Christmas tree fire prevention tips, we also encourage you to review the following fire safety tips that pertain to this time of year (compliments of amfam.com):

  • Candles should be kept away from your tree and any flammable decorations and should be extinguished before leaving a room.  Candles are also a major cause of household fires during the holidays.
  • When starting a fire in your wood stove or fireplace, use hardwood logs cut the season before. Do not toss wrapping paper or branches from your Christmas tree into the flames because flash fires can result. Chimneys and wood stoves should be inspected annually for creosote and cleaned regularly. Stockings should not be hung from your fireplace mantle in the path of sparks and flames.  Home heating equipment, such as wood stoves, space heaters and fireplaces, cause nearly one-third of all home fires according to the U.S. Consumer Product Safety Commission.
  • Inspect your lights before they go up to make sure they’re in good condition. Don’t plug too many into the same electrical circuit or overload extension cords. You should use no more than three light sets per extension cord. Unplug all lights when you leave the house and before going to bed.
  • Make sure everyone knows all of your home’s exits and you have a designated outdoor meeting place to regroup. If a fire does start in your home, stay as low as possible while heading for an exit to reduce your chance of smoke inhalation. If you do catch on fire, stop, drop and roll.

We wish a wonderful and safe Holiday Season.

Merry Christmas!

– S.O.
POB Agency

How to Clean a Glass Oven Door

We had a cookout a few weeks back and as I was hurriedly putting the mac-n-cheese in the oven, the flimsy foil pan bent and toppled.  About half of the Mac-n-Cheese fell on the inside of the oven door.

The oven was pre-heated and I was able to save half of the mac-n-cheese so I baked it.  I told myself I’d clean the oven “later”.  Well, it’s been about two months – not a few weeks – if I’m going to be honest.  This is what my oven looked like after two months of numerous uses since the messy mac-n-cheese spill.

GROSS!

GROSS!

I did some research on how to best clean the oven door so we can once again see through the glass.  Being mindful that I probably don’t want to use harsh chemicals that will later be baked along with our food, I found this “natural” remedy:  Water and Baking Soda.

Water + Baking Soda = Paste

Water + Baking Soda = Paste

If your oven is not as dirty as mine, mix about 1/4 cup of baking soda with water until it forms a runny paste.  If your oven is like mine (baked on thick cheese), you will need twice as much paste (like I did).

IMG_3448

Pour the mixture on and rub it in.  Let it sit 15-30 minutes.  I had to let mine sit 30 minutes.

IMG_3449

IMG_3451

First Time

After letting it sit, wipe it off.  If there are still spots, you can scrub with a scour pad. 

I had to do this TWICE and let it sit both times for a 1/2 hour.  Then I had to put some major elbow grease behind the scouring.

IMG_3455

Second Time

But, It worked!  I can see my floor through the glass!!

IMG_3462

Has this happened to you?  Please share your cleaning tips in the comments.

– S.O.
POB Agency

7 Ways to Prepare Your Home for Fall

IMG_3200
We’ve had some great weather lately and we’ve been spending A LOT of time outdoors.  We love when the weather gets cooler and we can enjoy our new bonfire that I built with my own two hands.  (Yes, I can get my hands dirty on occasion). 

Chances are you too have been spending more time enjoying the great outdoors.  While you’re outside having fun, take some time to prep your home for fall with these 7 must dos! 

  • Clean your gutters. Overflowing water from clogged gutters can damage your roof and lead to cracks in your home’s foundation.  Clear out your downspouts and direct them away from your foundation and basement to avoid water damage.
  • Replace damaged/missing shingles. Cracked, broken or missing shingles leave your roof exposed to the elements.
  • Trim trees and bushes. If you let trees and bushes grow too close to your home, they can block the sun and lead to water damage.
  • Have a professional tune your furnace. By having your furnace checked and tuned by a professional, you can reduce temperature variations, improve air quality and protect against carbon monoxide.
  • Check smoke and carbon monoxide detectors. If your smoke and carbon monoxide detectors run on batteries, check them at least once every season.
  • Put unused lawn equipment away. If you’ve finished with your lawnmowers, clippers, rake and other implements for the season, put them away in a safe place for next spring.
  • Have your chimney checked. A professional chimney sweep can evaluate the condition of your chimney and, if necessary, clean it to get rid of creosote, which is flammable and can be dangerous.

If you notice anything out of the ordinary while you’re inspecting your home and knocking out these 7 tips, contact us for advice.  If you’d like a referral for work that requires a professional, we can refer you to a reputable resource.

What other “must dos” are you doing to prepare your home for fall?  We’d love to hear from you in the comments section below.

Continue to stay in touch with us on Facebook, Twitter, & Pinterest.

– POB Agency